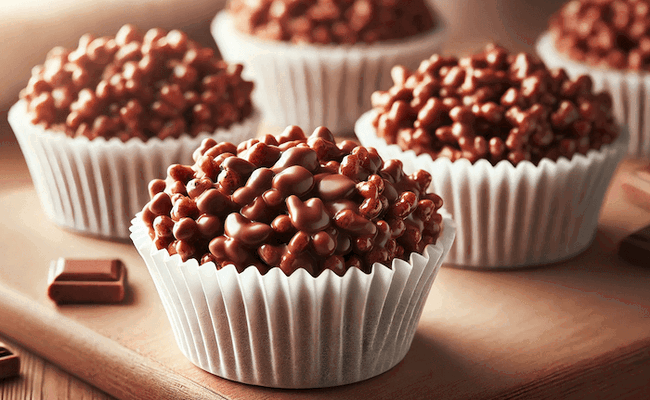
Old School Chocolate Rice Crispy Cakes
Rated 5.0 stars by 1 users
Category
Chocolate
Servings
9
Prep Time
15 minutes
Cook Time
5 minutes
Calories
120
Some treats never go out of style, and chocolate rice crispy cakes are one of them!
These old school classics bring back memories of childhood, from birthday parties to school fêtes and rainy-day baking sessions with family.
Simple to make yet irresistibly delicious, they combine the perfect crunch of Rice Krispies with the creamy sweetness of melted chocolate.
With no baking required, they’re the ultimate fuss-free treat, ideal for whipping up in minutes when a chocolate craving hits.
They’re also a fantastic recipe to make with kids, letting them get hands-on in the kitchen with minimal mess (and plenty of fun!).
Topped with mini chocolate eggs, sprinkles, or any of your favourite sweet treats, these crispy cakes are as fun to decorate as they are to eat.
So, grab your ingredients, roll up your sleeves, and get ready to enjoy a nostalgic bite of chocolatey bliss! 🍫✨

Ingredients
-
200g milk chocolate
-
75g Rice Krispies cereal
-
Mini chocolate eggs or any small sweet for decoration (optional)
-
Paper cupcake liners
Directions
Prepare the Chocolate:
Break the milk chocolate into small pieces and place it in a heatproof bowl.
Melt the Chocolate:
You can melt the chocolate either using a microwave or a double boiler method:
Microwave: Heat the chocolate in 30-second intervals, stirring between each interval until fully melted.
Double Boiler: Place the bowl over a pot of simmering water (make sure the bowl doesn't touch the water).
Stir occasionally until the chocolate is melted and smooth.
Mix with Rice Krispies:
Once the chocolate is melted, remove it from the heat and quickly stir in the Rice Krispies cereal.
Make sure all the cereal is well coated with chocolate.
Fill the Liners:
Spoon the mixture into paper cupcake liners.
You can use a cupcake tray to keep them stable as they set.
Add Decorations:
While the chocolate is still soft, press mini chocolate eggs or any small candies into the top of each cake for decoration.
Set the Cakes:
Let the cakes set at room temperature for about 20-30 minutes, or place them in the refrigerator for quicker setting.
Serve:
Once set, the milk chocolate rice crispy cakes are ready to be served.
Enjoy!
Recipe Notes
NOTE - Click here to see our famous Easy Melt Baking Chocolate...
If you have any questions how how to make these simple chocolate rice crispy using this recipe, please post a comment below and we will get back to you.
Servings: The recipe typically yields about 9 delicious rice crispy cakes.
Calories per serving: 120 calories.
Remember:Please tag #whitakerschocolates with photos of your old school, homemade chocolate crispy cakes.

How to Make Using a Tray Instead of Cupcakes
Using a tray instead of cupcake cases makes it even easier to slice into bars or squares.
Here’s how to do it step-by-step:
1. Line the Tray:
Use a square or rectangular baking tray (around 8x8 inches or similar).
Line it with greaseproof paper or parchment to prevent sticking.
2 . Prepare the Mixture:
Follow the same method of melting the chocolate and mixing in the Rice Krispies.
Ensure all the cereal is evenly coated.
3. Press into the Tray:
Pour the mixture into the lined tray and spread it out evenly.
Use the back of a spoon or a spatula to gently press it down so it sets firmly.
4. Add Decorations (Optional):
Sprinkle mini chocolate eggs, sprinkles, or extra chocolate chips on top while the mixture is still soft.
5. Let It Set:
Leave at room temperature for about 30 minutes, or place in the fridge for quicker setting (about 15 minutes).
6. Slice and Serve:
Once fully set, lift it out using the parchment paper.
Use a sharp knife to cut into squares or bars.
Now you’ve got easy, grab-and-go chocolate rice crispy bars—perfect for lunchboxes, parties, or just a sweet treat! 🍫✨
Storage Advice
Store your homemade Chocolate Rice Crispy Cakes in an airtight container at room temperature for 5-7 days, away from heat and light.
For longer storage, refrigerate up to 1 week or freeze up to 1 month, thawing at room temperature before serving.
Always keep in a sealed container to maintain the crunch.


3 comments
I made these as bars with a high-fiber cereal, dark chocolate and threw in some raisins and cashews for a more “breakfasty” bar. It turned out so well – the kids loved them with fruit this morning and the rest are all individually wrapped in the fridge for snacking. Way better than the sugary kids’ bars at the store, and fast to make. Thank you!
Just made them! Yummy! How long will they keep? Do you store in fridge or in cupboard?
Thankyou 🙂
Great recipe and bought back some very happy memories! :-)